
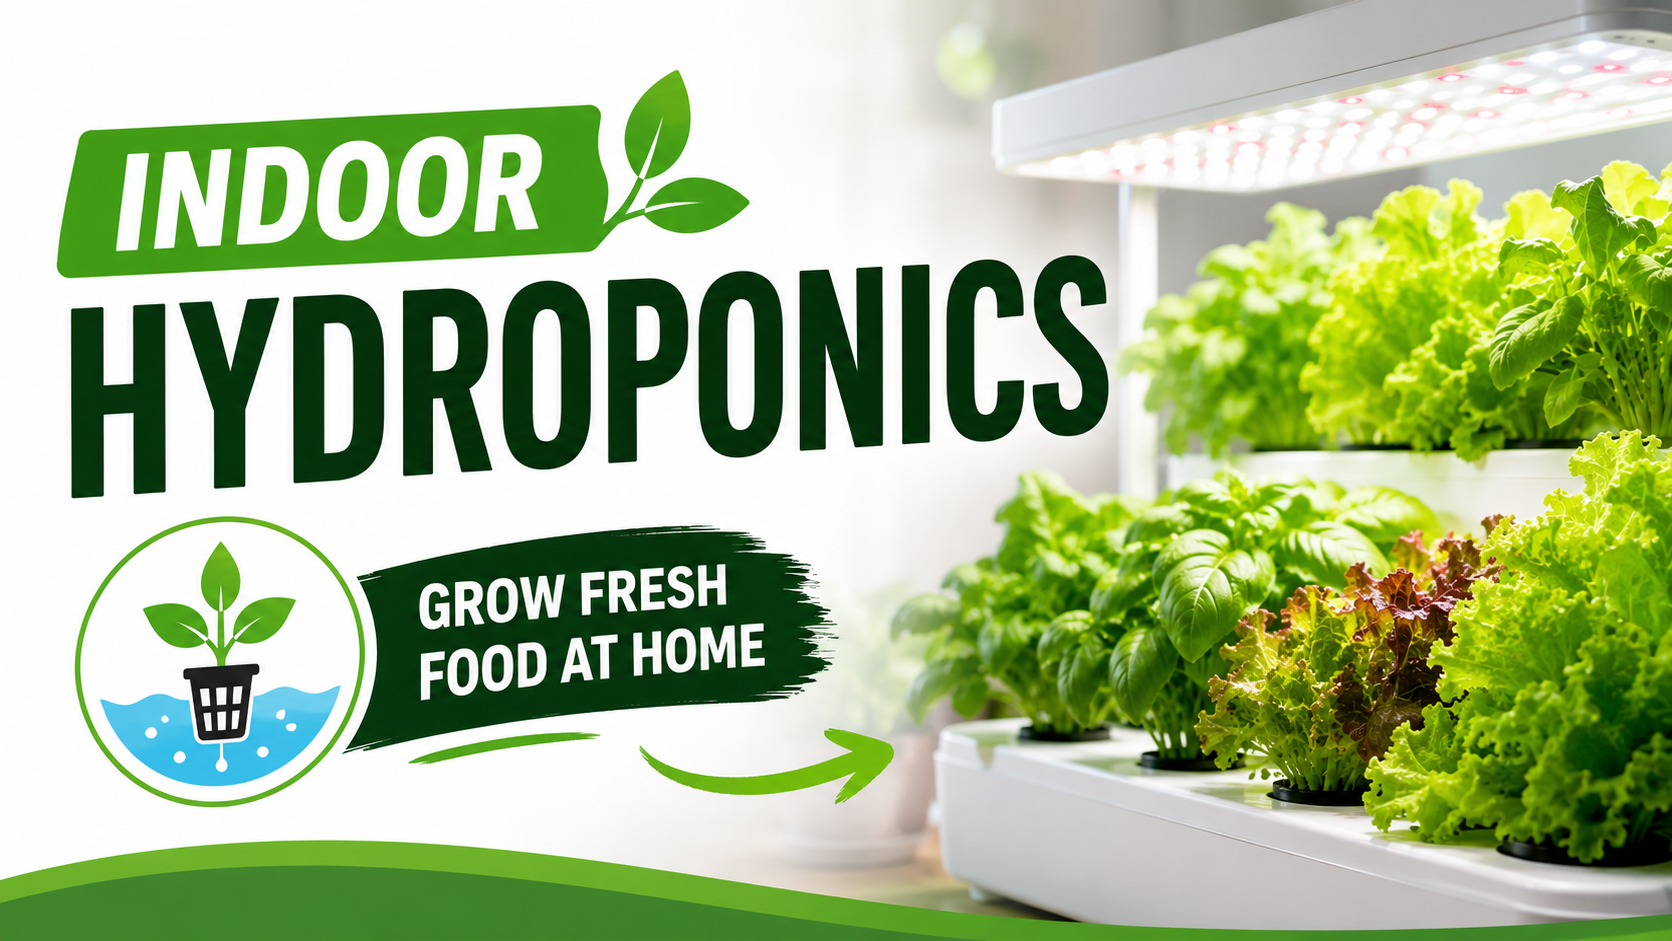
Indoor hydroponics is changing the way people grow food at home. And if you live in an apartment with no garden, no outdoor space, and zero prior experience with plants, it might be exactly what you have been looking for.
The concept is simple: instead of growing plants in soil, you grow them in nutrient-rich water. No dirt, no weeds, no guesswork about whether your plants are getting what they need. Just clean, efficient growing indoors, year-round, in whatever space you have available.
That could be a kitchen bench. A spare corner. A balcony the size of a parking space.
Interest in indoor hydroponics has grown sharply over the past few years, and it is easy to see why. Apartments are getting smaller. Supermarket prices are climbing. And a growing number of people, especially in cities like Singapore and Melbourne, want fresh food they have actually grown themselves, not produce that spent a week in a supply chain before reaching their plate.
The good news is that starting does not require a big investment, technical expertise, or any background in gardening. Modern hydroponic systems are genuinely beginner-friendly, and the results come faster than most people expect.
In this guide, you will learn how indoor hydroponics actually works, which systems make the most sense for beginners, what equipment you need (and what you can skip), the best plants to start with, and how to avoid the mistakes that catch most first-time growers off guard.
Whether you are in Singapore, Sydney, or anywhere in between, if you have a small space and a genuine interest in growing your own food, this guide is your starting point.
What Is Indoor Hydroponics?
At its core, hydroponics is simply growing plants without soil.
Instead of roots spreading through dirt to search for nutrients, your plants sit in or above a water-based solution that delivers everything they need directly to the root zone. Nutrients, oxygen, moisture: all of it comes from the water system you set up and manage.
It sounds futuristic, but it is actually an ancient concept. The Hanging Gardens of Babylon are thought to have used early hydroponic-like methods. NASA has been experimenting with hydroponics for space food production since the 1980s. What is genuinely new is how accessible and affordable the equipment has become for everyday people living in ordinary apartments, people who are not scientists or engineers, and do not need to be.
Here is a simple way to think about it:
In soil gardening, the soil acts as a middleman. It holds nutrients and slowly releases them to plant roots over time. In hydroponics, you cut out the middleman entirely. The plant gets what it needs immediately, in exactly the right amount, without expending energy searching.
This is the core reason why hydroponic plants often grow 30 to 50 percent faster than their soil-grown counterparts. The efficiency is real, and it shows up quickly, which is part of why the hobby tends to hook people after their very first grow.
For apartment dwellers and urban gardeners, this translates to something genuinely practical: fresh food, faster, in a smaller footprint, with less mess, and under your complete control. It is one of the few hobbies where the tangible, day-to-day benefits are just as compelling as the enjoyment of the process itself.
How Indoor Hydroponics Works
You do not need a biology degree to get this. In practice, most beginners feel comfortable with the basics within their first week of running a system. Understanding what each component actually does, though, makes it much easier to troubleshoot problems quickly and make smarter decisions from the start. Here is what makes a hydroponic setup work:
The Water Reservoir
This is the heart of the system. A reservoir is simply a container, usually a bucket, tote, or tank, that holds your nutrient-rich water. The size depends on your setup, but for beginners, a 10 to 20 litre container is a perfectly practical starting point.
One thing worth knowing early: bigger reservoirs are generally more forgiving. A larger volume of water means slower, smaller fluctuations in pH and nutrient concentration, which gives you more time between checks and reduces the risk of something going wrong quickly. For a first-time setup, a 15 to 20 litre container tends to hit the sweet spot between easy handling and stable water chemistry.
Nutrients
Plants need a range of elements to survive and thrive: nitrogen, phosphorus, potassium, calcium, magnesium, and a handful of trace minerals. In soil, these are present naturally and replenished with compost or fertiliser. In hydroponics, you provide them yourself in the form of a liquid or powdered nutrient solution mixed into your water.
Good-quality hydroponic nutrients typically come in two or three parts, often labelled “Grow,” “Bloom,” and “Micro,” and you mix small amounts into your reservoir following the manufacturer’s guide. It sounds more complicated than it is. Most beginners find the mixing process feels almost routine by their second or third reservoir change. It is genuinely not a chemistry class.
One useful thing to know upfront: hydroponic nutrients are highly concentrated. A modest-sized bottle goes a surprisingly long way, which makes the ongoing cost much lower than it might initially appear.
Grow Lights
Sunlight is the primary fuel for plant growth. Indoors, you replicate it with artificial grow lights. LED grow lights are the clear standard today. They are energy-efficient, generate relatively little heat, and deliver a full spectrum of light that plants genuinely thrive under.
LED technology has improved dramatically over the past five years, and prices have come down considerably as a result. A quality panel that would have cost several hundred dollars a few years ago is now available for a fraction of that price. This is one of the areas where being a beginner today is a real advantage. You are entering the hobby at a point where the technology is both better and more affordable than it has ever been.
If your setup is near a bright window, particularly useful in sunny Australian climates, you may be able to supplement natural light rather than rely entirely on artificial lighting. That said, a dedicated grow light gives you far more control and removes the variable of which direction your apartment faces or what season it is.
Air Pumps and Oxygenation
Plant roots need oxygen just as much as leaves do. In soil, air pockets between particles provide this naturally. In hydroponics, you use an air pump with a simple air stone, the same kind used in fish tanks, to bubble oxygen continuously through the reservoir water.
Many beginners underestimate how important this step is until they encounter root rot for the first time. Brown, slimy roots are almost always a sign of insufficient oxygen in the water, and recovering a plant from root rot is considerably harder than preventing it with a basic $15 air pump. It is one of those small investments that pays for itself many times over.
Growing Medium
Since there is no soil, you need something to anchor your plants physically and support the root structure. Common options include:
- Rockwool: lightweight, sterile mineral fibre; particularly good for seed starting
- Clay pebbles (LECA): reusable, excellent drainage and airflow around roots
- Coco coir: made from coconut husks; holds moisture well, good for wicking systems
- Perlite: lightweight volcanic glass; often mixed with other mediums for added aeration
For most beginners, clay pebbles tend to be the most practical starting choice. They are reusable across multiple grows, easy to rinse clean between cycles, widely available at garden centres and online, and forgiving across a range of plant types. A single 5-litre bag will easily serve you through several grows.
Benefits of Indoor Hydroponics
People discover hydroponics for different reasons: curiosity, limited space, sustainability, food costs. But almost everyone ends up staying for roughly the same set of reasons.
Faster growth. Without the stress of searching for nutrients through soil, plants dedicate more energy to growing upward and outward. Lettuce that takes around 60 days in soil can be harvest-ready in 30 to 35 days hydroponically. For beginners, that faster feedback loop makes a real difference to motivation. Your first harvest arrives sooner than you expect, and that is enough to keep most people going.
Year-round growing. Singapore’s tropical climate is humid and consistently warm, which is great for some outdoor plants but a reliable haven for pests and fungal problems. Australia’s southern states experience cold, wet winters that effectively shut outdoor food growing down for months at a stretch. Indoors, you control the conditions entirely. Your plants do not know or care what month it is.
Water efficiency. This tends to genuinely surprise people when they first hear it. Hydroponic systems typically use up to 90 percent less water than conventional soil gardening. In a closed recirculating system, water is reused rather than lost to ground absorption or surface evaporation. For anyone in drought-prone parts of Western Australia or inland Queensland, this is not just an interesting statistic. It is a meaningful practical consideration.
Less mess. No soil means no dirt tracked across the floor, no muddy pots tipping over on benches, and no heavy bags of compost taking up storage space. A well-maintained hydroponic setup is remarkably clean compared to most forms of indoor gardening. For apartment dwellers who care about their living space, this tends to be an underappreciated benefit until you experience it directly.
Perfect for small spaces. A simple lettuce setup fits comfortably on a kitchen bench. Vertical towers let you grow dozens of plants in the footprint of a single floor pot. The insight that resonates most for apartment growers is that vertical space is almost universally underused. Hydroponics is one of the most effective ways to reclaim it.
Fewer pests and diseases. Soil is where the majority of common plant pests live, breed, and overwinter. Remove the soil and you remove most of that risk along with it. Fungus gnats, many forms of root rot, and a long list of soil-borne diseases become largely non-issues. For anyone who has spent time battling a persistent fungus gnat infestation in indoor pot plants, this single benefit alone can feel like a genuine turning point.
Best Hydroponic Systems for Beginners
Several different hydroponic methods exist, each with a different approach to delivering water and nutrients to roots. The important thing to understand early is that simpler systems work just as well as more complex ones for beginners, and often better, because there are fewer components that can fail or need adjusting.
Deep Water Culture (DWC)
The most popular beginner method, and with good reason. Plants sit in net pots suspended above a reservoir of nutrient solution, with roots hanging directly into the water. An air pump keeps the solution oxygenated.
A basic DWC setup can be assembled from a 20-litre bucket and around $50 to $80 AUD worth of components. It is simple enough to understand at a glance, reliable enough to produce genuinely impressive results, and forgiving enough to recover from the small errors that most beginners inevitably make. For most beginners, DWC is the best place to start because it balances simplicity with real performance. Ideal for: lettuce, herbs, spinach.
Nutrient Film Technique (NFT)
In NFT systems, a thin, continuous stream of nutrient solution flows over the roots through a slightly tilted channel or tube. Roots are exposed to both the flowing water and the air above it, which promotes very efficient growth.
NFT is widely used in commercial hydroponic operations across Australia and Singapore. Those long white or grey pipe channels you sometimes see at farm tours or hydroponic produce operations are almost always NFT systems. They require a pump, tubing, and a collection reservoir, making them a step up in complexity from DWC. Still very manageable for a beginner willing to do a little reading first. Ideal for: lettuce, strawberries, herbs.
Kratky Method
The Kratky method is passive hydroponics in its purest form: no pumps, no timers, no running electricity for the water system at all. You fill a container, place your plant in a net pot, and leave an intentional gap between the water surface and the base of the net pot. As the plant drinks, the water level drops naturally, creating an expanding air gap that oxygenates the roots over time.
It sounds almost suspiciously simple, yet it works reliably well for leafy greens and herbs. A mason jar and a net pot lid are genuinely all you need to start. This method is particularly well-suited to people who travel occasionally, prefer minimal maintenance, or simply want to test the concept of hydroponics before committing to a more involved setup. Ideal for: lettuce, herbs, small greens.
Vertical Hydroponics
Vertical systems stack growing positions on top of each other, significantly increasing how many plants you can grow per square metre of floor space. Tower gardens are the most widely used format. A central column circulates water from a reservoir at the base up to the top, where it trickles down through each individual planting pocket.
In Singapore apartments where floor space genuinely is at a premium, vertical systems often make the most practical sense of all the available options. A single tower positioned in a corner or on a balcony can supply more fresh leafy greens than most households need for regular salads, without meaningfully reducing the room’s usable area. Ideal for: herbs, lettuce, kale, strawberries.
System Comparison Table
| System | Difficulty | Space Required | Cost to Start | Best For |
|---|---|---|---|---|
| Kratky Method | Beginner | Very small | $20 to $40 AUD | Herbs, lettuce |
| Deep Water Culture (DWC) | Beginner | Small to Medium | $50 to $100 AUD | Lettuce, herbs, spinach |
| NFT | Intermediate | Medium | $100 to $250 AUD | Lettuce, strawberries |
| Vertical Tower | Beginner to Intermediate | Small (vertical) | $80 to $200 AUD | Mixed greens, herbs |
| Ebb and Flow | Intermediate | Medium to Large | $150 to $400 AUD | Variety, larger plants |
Best Plants to Grow Indoors with Hydroponics
Not every plant is a practical choice for a beginner hydroponic system. Some crops need significantly more nutrients, stronger lighting, more physical space, or more precise environmental control than a first-time grower is typically ready to provide. The plants below are reliable, forgiving, and genuinely useful in the kitchen, which makes them the right starting point.
Lettuce
The undisputed beginner plant for hydroponics, and not without reason. Lettuce grows quickly, tolerates a reasonably wide range of nutrient concentrations without suffering noticeably, and can be harvested continuously by removing outer leaves rather than pulling the whole plant. Varieties like Butterhead, Oakleaf, and Cos all perform well under LED lighting in a DWC or NFT system. Expect full heads in around 4 to 5 weeks from transplant.
For most apartment beginners, lettuce is the most practical first plant. Results come fast, the plant is immediately useful in the kitchen, and the low-maintenance nature of it gives you time to focus on understanding the system rather than rescuing a struggling plant.
Basil
If you cook Italian, Thai, or Vietnamese food regularly, a thriving hydroponic basil plant is a genuine kitchen upgrade. It grows vigorously, produces far more usable leaves than a comparable pot plant, and the aroma while harvesting is honestly one of the small pleasures of the hobby.
One practical note for Singapore setups: basil prefers temperatures above 20 degrees Celsius, and a heavily air-conditioned room can actually chill the plant below its comfort zone. If you notice slow growth or leaf drop, temperature is worth checking before adjusting nutrients.
Mint
Mint is about as close to foolproof as hydroponics gets. It roots quickly from cuttings, grows rapidly, and produces reliably flavourful leaves through many successive harvests. Spearmint, peppermint, and Vietnamese mint all thrive. If you regularly pay supermarket prices for fresh mint, which wilts within a day or two of purchase, growing your own hydroponically makes immediate financial and culinary sense.
Spinach
Spinach prefers cooler conditions in the 15 to 22 degrees Celsius range, which makes it a natural choice for Australian growers through autumn and winter, and entirely practical for Singapore growers in a reliably air-conditioned space. It is nutritionally dense, grows quickly enough for near-continuous harvesting, and responds well to both DWC and Kratky systems. Baby spinach leaves can be ready in as little as three weeks, one of the faster results available to beginners.
Cherry Tomatoes
Tomatoes are a meaningful step up in complexity. They need more nutrients, stronger lighting than leafy greens, regular pruning to manage growth, and physical support structures as vines develop. They are not a beginner’s first plant, but they are absolutely achievable for someone who has completed a couple of successful lettuce or herb grows and wants a new challenge. Cherry varieties like Tiny Tim or Tumbling Tom are particularly well-suited to indoor growing because of their naturally compact size. The payoff of harvesting tomatoes from a plant growing inside your apartment is, as many hydroponic growers discover, genuinely difficult to replicate from a supermarket punnet.
Equipment You Will Need to Get Started
One of the most common misconceptions about hydroponics is that it requires expensive or complicated equipment. In reality, a functional beginner setup requires a handful of affordable items, the majority of which you can source online or from local hydroponics and aquarium suppliers.
Grow lights. For a small setup of 1 to 4 plants, a 45W to 100W full-spectrum LED panel is sufficient. Look for lights in the 4000 to 6500K colour temperature range for leafy greens and herbs. Brands like Mars Hydro and Spider Farmer have become genuinely reliable choices at mid-range price points and are widely stocked for Australian and Singapore buyers. Avoid the temptation to cut corners here. Poor lighting is one of the most common reasons beginner setups underperform.
Reservoir/container. A food-grade plastic tote, bucket, or purpose-built hydroponic reservoir. Dark or opaque containers are meaningfully better because they prevent light from reaching the water and triggering algae growth. A standard black storage tote from a discount home store works perfectly well and costs almost nothing. There is no need to buy a purpose-labelled hydroponic container if the basics are met.
Net pots. Small plastic mesh pots, typically 50mm to 75mm in diameter, that hold your growing medium and support each plant. Very inexpensive, usually a few dollars for a pack of ten or more.
Growing medium. Clay pebbles (LECA) are the most versatile and reusable choice for most beginners. A 5-litre bag is more than adequate for a starter setup and will last through multiple grows with basic rinsing between cycles.
Hydroponic nutrients. A two or three-part liquid nutrient solution designed specifically for hydroponics, not general-purpose garden fertiliser, which behaves differently in water and does not provide the full mineral profile plants need in a soil-free system. General Hydroponics Flora Series and Canna Aqua are well-regarded options available in Australia. In Singapore, Hesi and Plagron are commonly stocked by local suppliers.
Air pump and air stone. A basic aquarium air pump ($10 to $20) with a length of flexible airline tubing and a small air stone handles DWC oxygenation perfectly. The kind sold at pet stores for fish tanks is exactly what you need. There is genuinely no advantage to buying hydroponics-branded versions at higher prices.
pH meter and pH adjustment solutions. This is arguably the single most important item on the list, and the one beginners are most often tempted to skip or delay. Your nutrient solution must sit between pH 5.5 and 6.5 for most plants. Outside this range, roots cannot properly absorb nutrients regardless of how well you have mixed them. A basic digital pH meter costs around $15 to $30 and will last for years with minimal maintenance. Buy one before you start.
Timer. A simple plug-in mechanical timer for your grow lights. Most plants need 12 to 18 hours of light per day depending on the crop. A timer costs less than $15, removes a daily mental task from your routine, and ensures the light cycle stays consistent regardless of whether you are home.
Step-by-Step Beginner Setup Guide
Let us walk through building a simple Deep Water Culture (DWC) system. It is the most widely recommended starting point for beginners: uncomplicated enough to assemble in an afternoon, yet capable enough to produce a genuinely impressive first harvest.
Step 1: Choose your container. Get a 15 to 20 litre opaque plastic tote or bucket with a lid. Cut or drill holes in the lid to fit your net pots snugly so they sit securely without falling through. Standard 50mm net pots suit most leafy greens well. A sharp craft knife or a basic hole-saw drill bit both cut cleanly through standard plastic lids.
Step 2: Set up the air system. Place your air stone at the bottom of the reservoir. Run the tubing up and out through a small hole near the top of the container, then connect it to your air pump outside. Keep the pump positioned above the waterline. This prevents water from siphoning back into the pump body if it is ever switched off unexpectedly.
Step 3: Mix your nutrient solution. Fill the reservoir with clean water, then add nutrients according to the manufacturer’s instructions. Start at roughly half-strength for seedlings. Young roots are sensitive, and the standard advice to go gentle early is genuinely worth following. Check and adjust the pH to sit between 5.8 and 6.2 before adding plants.
Step 4: Start your seedlings. Seeds can be started in rockwool cubes or coco coir plugs kept moist, not waterlogged, in a warm spot until a root tip emerges from the bottom, typically 5 to 10 days depending on the plant. Alternatively, purchase young seedlings from a nursery and gently rinse all soil from the roots before transferring them into your system. This rinsing step matters more than it might seem: soil residue in a hydroponic reservoir can introduce fungal pathogens and disrupt water chemistry.
Step 5: Place plants in net pots. Fill each net pot loosely with clay pebbles, nestle the seedling into the centre with roots pointing downward, and add a few more pebbles to hold it stable. The bottom of the net pot should just touch the water surface at this stage.
Step 6: Set the water level. Initially, water should reach the base of the net pots to keep young roots in contact with the nutrient solution. As the plant establishes over the first 1 to 2 weeks and roots grow downward into the reservoir, you can gradually lower the water level to create a small air gap below the net pot. This gap plays an important role in root oxygenation and is a detail that noticeably improves plant health once roots are long enough to reach the solution without it.
Step 7: Set up and program your grow light. Position the light 20 to 30cm above your plants, adjusting based on the manufacturer’s recommendation for the specific wattage. Set your timer for 14 to 16 hours on, 8 to 10 hours off for leafy greens. Consistency in lighting schedule matters. Irregular cycles stress plants in ways that show up in slower growth and reduced yield, even when everything else looks right.
Step 8: Monitor and maintain. Check pH and water levels every 2 to 3 days. Top up with plain pH-adjusted water as levels drop between reservoir changes, and do a complete refresh with fresh water and nutrient mix every 1 to 2 weeks. The single best maintenance habit most experienced growers recommend to beginners is simply to look at your plants daily. Healthy colour, upright growth, and new leaves emerging steadily are all signs your system is working well.
Common Beginner Mistakes (and How to Avoid Them)
Every beginner makes at least a few of these mistakes. That is not a criticism; it is just how most practical skills are learned. Knowing what to watch for ahead of time means you will recognise problems sooner and recover from them faster.
Overfeeding with nutrients. This is probably the most instinctive mistake in hydroponics. It feels logical that more nutrients would produce bigger, faster plants, but excess nutrient concentration causes what is known as nutrient burn: brown, crispy leaf tips, curled edges, and stunted growth. Start at half the recommended dose, particularly with seedlings, and only increase gradually if plants show signs of actual deficiency like yellowing lower leaves. The general principle holds well here: when in doubt, use less.
Ignoring pH. This is the single most common reason beginner grows fail, and it is often the last explanation growers consider because the problem is not always visible on the plant until damage has been accumulating for a while. A nutrient solution that drifts outside the 5.5 to 6.5 range effectively locks nutrients away from the roots even when they are present in the water. Check pH every 2 to 3 days, especially in the early weeks while you are still learning how your particular setup behaves over time.
Starting with the wrong plants. Tomatoes, cucumbers, and capsicums are appealing choices since they produce food you can see and feel the value of, but they are demanding plants that need specific lighting levels, higher nutrient concentrations, regular pruning, and physical support structures. Save them for after you have had a few successful, confidence-building grows with lettuce and herbs. There is nothing to prove by starting hard, and the simpler crops are genuinely rewarding in their own right.
Letting light reach the reservoir. Algae only needs two things to establish: nutrients and light. Your reservoir water is full of nutrients, so the one variable you can fully control is light exposure. Use opaque or dark containers, keep lids on at all times, and cover any tubing or entry points that might let light in. Algae grows surprisingly quickly in nutrient-rich water with even indirect light exposure, and once it is established it competes with your plants and clogs system components.
Neglecting root health. Healthy roots are white and slightly fibrous. Once you have seen them, the difference from unhealthy roots is immediately obvious. Brown, slippery, or slimy roots almost always indicate root rot, typically caused by inadequate oxygenation or water that is too warm. Keep reservoir temperature between 18 and 22 degrees Celsius and verify your air pump is running without interruption. In Singapore, where ambient temperatures are high year-round, reservoir water can warm up faster than expected. A small aquarium thermometer is a worthwhile addition to any setup.
Inconsistent lighting. Plants depend on a predictable day/night cycle to manage their internal growth rhythms. Irregular lighting, some days on and some days off with varying run times, produces measurably worse results than consistent schedules, even when all other variables are the same. A basic timer removes this variable completely for less than $15.
Hydroponics vs Traditional Soil Gardening
This comparison comes up in almost every beginner conversation, and it is worth addressing honestly rather than giving a blanket endorsement of one over the other. Both approaches have genuine strengths, and the right choice depends significantly on your living situation and what you are actually trying to grow.
| Factor | Indoor Hydroponics | Soil Gardening |
|---|---|---|
| Space required | Very small (bench, shelf, corner) | Needs outdoor or large indoor space |
| Grow speed | 30 to 50% faster than soil | Standard growing rate |
| Water usage | Up to 90% less water | High water requirement |
| Mess level | Minimal | Soil, dirt, compost |
| Pest risk | Low (no soil-borne pests) | Moderate to high |
| Seasonal limitations | None (fully controlled indoors) | Weather-dependent |
| Initial setup cost | $50 to $300+ | $20 to $100+ |
| Learning curve | Moderate (pH, nutrients) | Lower (more intuitive) |
| Ongoing maintenance | Regular monitoring needed | Periodic watering, weeding |
| Best for apartments | Excellent | Limited |
The fair summary is this: soil gardening feels more instinctive for total beginners because it mirrors what most people have seen or done before. You water a plant, it grows, something eats it, you figure it out. Hydroponics has a slightly steeper initial learning curve, concentrated mostly around understanding pH and nutrient mixing. Once those two things click, most growers find it just as natural, and for indoor, space-constrained situations, the advantages are clear enough that most people do not look back.
Cost of Starting Indoor Hydroponics
The most straightforward question most beginners ask is also the most reasonable one: how much is this actually going to cost? The answer is genuinely flexible, with practical options at every level of commitment.
Budget Setup (approximately $50 to $100 AUD)
A Kratky or basic DWC system assembled from a storage tote, net pots, clay pebbles, a simple LED panel, a basic air pump, and a starter bottle of nutrients. Realistically, this supports 4 to 6 lettuce plants and several herb seedlings, more than enough to learn the fundamentals. Many growers start here and stick with a version of this setup indefinitely because it simply works. It is the right starting point for anyone who wants to understand the basics before spending further.
Mid-Range Setup (approximately $150 to $300 AUD)
A quality LED grow light (Mars Hydro TS600 or comparable), a dedicated hydroponic reservoir, a proper multi-part nutrient kit, a reliable digital pH meter, and either a vertical tower or a small NFT channel. This level of investment supports 8 to 20 plants and produces a steady, reliable supply of fresh salads and herbs over time.
For most beginners in Singapore or Australia, this is the tier that makes the most sense. The pH meter, often skipped in true budget setups, makes a significant enough difference to justify the additional cost, and the better LED light produces noticeably more productive plants than entry-level options.
Premium Smart Setup (approximately $400 to $1,000+ AUD)
All-in-one smart gardens like the Rise Garden or AeroGarden Farm series, or custom-built systems with dedicated tents and automated climate management. These typically include app monitoring, automated reminders, and programmable full-spectrum lighting. They are excellent systems with genuinely minimal manual management. The trade-off is simply cost. Worth considering if you want to skip the DIY learning curve entirely, or if you are planning a serious long-term indoor growing setup from day one.
Tips for Apartment Hydroponics
Apartment living introduces practical considerations that outdoor gardeners rarely encounter. A few targeted adjustments make the whole experience noticeably smoother and help you avoid the common friction points that lead beginners to abandon setups prematurely.
Work with your available light. North-facing apartments in Australia receive direct sun for the largest portion of the day, a genuine advantage if your setup sits near a window. In Singapore, east and west-facing windows provide useful morning and afternoon light respectively, though supplemental LED lighting is still advisable for year-round consistency. South-facing apartments in Australia get the least direct sun and will benefit most from a dedicated grow light regardless of how close the setup is to a window.
Think vertically first. In most apartments, floor and bench space is limited but height is underused. A tower garden, wall-mounted channel system, or a tall wire shelving unit with a grow light on each shelf can accommodate a substantial number of plants without meaningfully impacting day-to-day use of the room. In smaller Singapore apartments especially, vertical systems tend to unlock growing capacity that a horizontal setup simply cannot match.
Take humidity and airflow seriously. Plants transpire and release moisture into the surrounding air as part of normal growth. In a small, enclosed apartment room, multiple plants can raise humidity noticeably, which creates conditions that encourage mould on plant surfaces and increases the risk of root issues. A small clip-on fan running a few hours a day provides adequate airflow in most setups. In Singapore’s already-humid climate, this is worth establishing as a habit from the beginning rather than reacting to problems after they appear.
Choose the right location for your air pump. Air pumps produce a soft but continuous hum. In a kitchen or living area this is easy to tune out, but in a bedroom or home office it can become distracting. If your setup needs to go near where you sleep or work, look specifically for models marketed as “ultra-quiet” or “silent.” The difference is real. Placing the pump on a small piece of foam or a folded cloth also reduces the vibration-transferred noise that carries through hard benches and floors.
Use your balcony if you have one. Even a small apartment balcony is some of the most productive hydroponic space you have access to. Natural light, fresh air circulation, and the ambient temperature range make balcony setups perform well, often better than comparable indoor setups. A compact vertical tower or small NFT system can sit on a balcony without taking up meaningful usable space. Just check your building’s strata or condo rules regarding installations before setting anything up permanently. Most buildings have no issue with portable self-contained systems.
Be aware of scent in small spaces. Most hydroponic systems have a pleasant, faintly green smell that is easy to live with. Basil and tomatoes produce more noticeable aromas as they mature and during harvesting. In a well-ventilated apartment this is rarely an issue, but in a very small or sealed space it is worth considering as part of where you locate your system.
The Future of Indoor Hydroponics
Indoor farming has moved well past the point of being a niche hobby or a research novelty. It is increasingly part of how cities, governments, and individuals are thinking seriously about food security, environmental sustainability, and urban resilience.
In Singapore, vertical farming and controlled-environment agriculture are explicit government priorities. The national “30 by 30” goal, producing 30 percent of the country’s nutritional needs domestically by 2030, has driven meaningful investment in indoor food production at every scale, from multi-storey commercial farms to community growing initiatives to individual apartment setups. A visible side effect of this push is that Singapore’s local hydroponics supplier network has expanded considerably, making equipment easier to source and more competitively priced than it was even a few years ago.
In Australia, the convergence of climate pressure, supply chain disruption from repeated flood and drought events, and a broader cultural shift toward knowing where food comes from has renewed genuine consumer interest in local, home-based food production. Urban farms are becoming more visible in Melbourne laneways, on Sydney rooftops, and in converted Brisbane warehouses. The movement is gradual but real, and home growing is a natural part of it.
For individual growers, the technology continues to get smarter while simultaneously getting simpler to operate. Smart garden devices now monitor pH, nutrient levels, water temperature, and light cycles automatically, with alerts pushed to a phone when something drifts out of range. This kind of monitoring used to require significant technical knowledge. Now it requires an app. The effect on beginner success rates is significant.
The integration of home hydroponics with residential solar energy is another development worth watching, particularly in Australia. Running grow lights from a home solar system effectively makes the energy cost of indoor food production negligible and makes the environmental footprint genuinely minimal.
What is clear from all of this is that indoor hydroponics is transitioning from a curiosity into a considered lifestyle choice for a meaningful and growing number of urban residents. The cost of entry has never been lower. The technology has never been better. And the reasons to grow your own food, whether economic, environmental, or personal, have rarely been more relevant.
Your First Harvest Is Closer Than You Think
Indoor hydroponics carries a reputation for being technical and complicated that it no longer deserves. It earned that reputation in an era when equipment was expensive, information was scattered, and the hobby genuinely required more patience and research than most beginners had time for.
That is not where things stand now.
Today, a functional first system can be assembled in an afternoon from equipment ordered online, and a real, harvestable first crop is typically four weeks away from setup day. The learning curve is real: pH management and nutrient mixing do take a little practice. But it is gentle, the feedback is quick, and the satisfaction of pulling something fresh from your own system is a strong motivator to keep going.
Start with something small and forgiving. A Kratky jar. A DWC bucket with a few lettuce plants. A handful of basil seedlings in a vertical tower on the balcony. Get comfortable with the routine before expanding. Let the system teach you rather than trying to master everything from theory alone.
Once you harvest that first head of home-grown lettuce, crisp and flavourful in a way that supermarket greens rarely match, grown entirely by you in a space no larger than a carry-on suitcase, you will understand why so many apartment dwellers and urban gardeners get quietly and thoroughly hooked.
The technology is there. The information is here. The only remaining step is to begin.
